
Rigid box wrapping bubbles should be investigated by tracing where the paper first loses contact with the board. Start with the incoming materials, then inspect adhesive application, placement, wrapping and pressing in order. Increasing pressure immediately can conceal the original fault or introduce surface damage. The useful result is a repeatable combination of materials and settings that produces acceptable boxes after the agreed conditioning period. This guide sets out a practical investigation and supplier-trial record for wrapped rigid boxes. It does not prescribe a universal glue temperature, pressing force or production speed, because those depend on the adhesive, covering paper, box construction and equipment.
Define the defect before adjusting the machine
Describe what the inspector actually sees. A raised pocket in the middle of a panel, a wrinkle near a corner, a lifted turn-in and a dent are different observations. Photograph the defect under angled light and mark its position on a simple box sketch. State when it appeared: immediately after wrapping, after pressing, after storage or after fitting the lid. Keep the observation separate from the suspected cause. “Bubble on the long wall after storage” is more useful than “bad glue” at the start of an investigation.
Compare several consecutive boxes. A defect that repeats in the same place deserves a different investigation from random marks scattered across the run. Record orientation so that the operator can relate the affected side to the machine’s feed direction. Separate boxes from the start of a run, steady production and restarts. If those groups are mixed together, a transient setup problem may look like a persistent material failure, or a recurring production problem may disappear inside an overall average.
Establish a trustworthy reference sample
Use an approved sample representing the actual paper, board, artwork and construction. An unprinted white sample may be easier to inspect but may not represent the surface and stiffness of the commercial job. Identify the paper lot, board lot, adhesive grade and drawing revision. Record which person approved appearance and which person approved fit. An attractive lid is not acceptable if it cannot assemble correctly with the matching base and insert.
Agree the viewing conditions and inspection timing before discussing rejection rates. For decorative packaging, lighting and viewing angle strongly affect what people notice. Record whether the box is inspected empty or with its insert installed. Define the appearance areas that matter most to the customer, while maintaining the structural requirements across the entire box. Use labeled boundary samples for subjective defects where appropriate, so different shifts apply the same decision rather than inventing new limits.
Inspect the board and covering paper first
Check incoming pieces for warp, contamination, uneven cutting and visible surface damage. Confirm that the board assembly matches the drawing before wrapping it. A wrapping adjustment cannot correct an incorrectly assembled inner box without creating another compromise. Compare an unwrapped assembly with the retained reference and note whether the problem is already present. If board geometry is unstable before the covering operation, investigate that upstream condition first.
Handle the covering paper consistently. Keep materials identified and protected according to their suppliers’ storage instructions. Record the environment when comparing trials made on different days. Do not introduce an arbitrary moisture target copied from another paper grade. If a change of paper supplier coincides with the defect, retain both lots and conduct a controlled comparison. The objective is to identify which material change matters, not to prove that every lot from one supplier will behave the same way.
Check adhesive application as a separate stage
Confirm the adhesive grade and the supplier’s application instructions. Record the preparation method, permitted operating range and relevant maintenance checks. Avoid changing dilution, temperature or another material variable without the adhesive supplier’s approval. Identify the interval between application and contact with the box, especially when the line pauses. Treat a long interruption as a distinct operating condition to be reviewed rather than assuming the next sheet behaves exactly like a sheet in continuous production.
Inspect the applied sheet using a safe, approved sampling method. Look for inconsistent coverage, contamination and repeatable application patterns. Label these as observations; a photograph alone may not establish the amount of adhesive deposited. If measurement is needed, agree a suitable method with the supplier. Save the application record alongside the finished box so the investigation can connect an upstream condition to the later appearance instead of comparing unrelated samples.
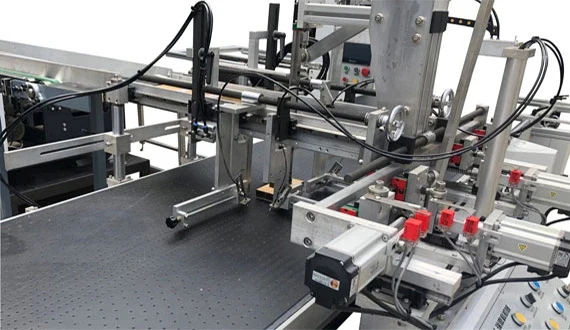
Follow placement, wrapping and pressing in order
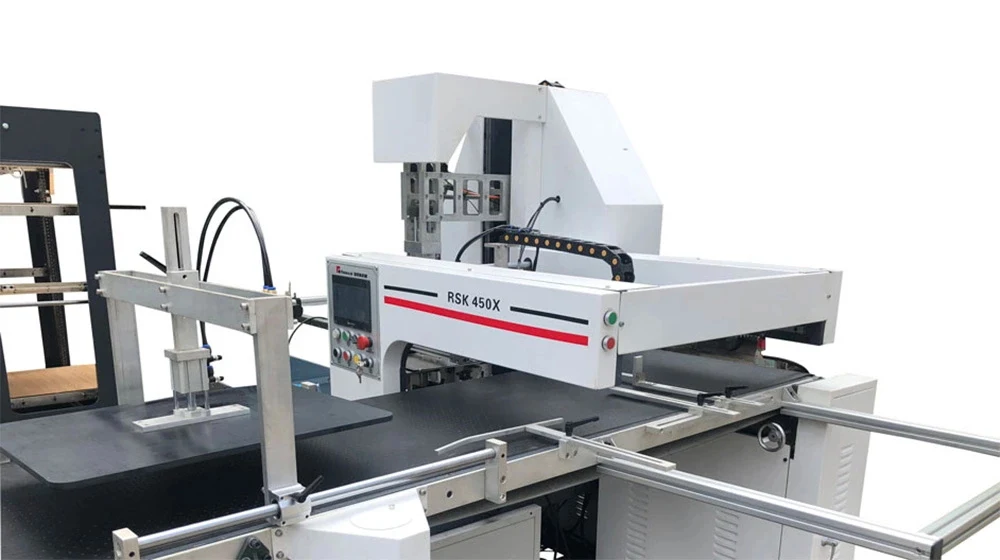
Realstar’s RSK-450X rigid box making machine presents placement, wrapping and pressing as connected operations. During an acceptance trial, inspect those stages individually where the manufacturer’s procedure permits it. Confirm the location of the inner box on the covering sheet before interpreting an uneven turn-in as a pressing fault. Identify which surfaces first contact the paper and where surplus material must fold around the corners.
Inspect a representative sample after each accessible stage. If the paper is already wrinkled before pressing, changing the final press alone does not address where the wrinkle began. If the surface looks sound before pressing but becomes marked afterward, examine the approved setup and contact surfaces with the supplier. Keep hands and tools away from moving parts. Any internal inspection, cleaning or adjustment must follow the equipment’s safe access and isolation instructions.
Use a symptom-to-evidence worksheet
The table below is an investigation aid rather than a diagnosis chart. More than one mechanism can produce a similar appearance. Select the next observation based on where the problem first appears, and confirm the cause through a controlled trial. Do not treat a suggested check as permission to reach into the machine or alter a protected setting.
| Observed symptom | Next evidence to collect | Decision supported |
|---|---|---|
| Pocket at a repeatable location | Compare paper contact before and after the wrapping stage | Whether to investigate placement or later pressing |
| Random raised areas | Compare material lots and application observations | Whether variation follows material or process |
| Lifted turn-in after a pause | Compare labeled restart and steady-run samples | Whether restart handling needs a separate procedure |
| Corner wrinkles | Compare blank geometry and fold sequence with the approved sample | Whether the drawing or setup needs review |
| Surface marks after pressing | Examine approved contact surfaces and retained pre-press samples | Whether pressing introduces the defect |
| Poor lid fit | Measure the assembly before and after wrapping | Whether geometry changes during production |
Record a hypothesis before making each adjustment. For example, “the defect follows the restart interval” can be tested by comparing identified samples from steady running and an approved restart. Changing several settings simultaneously may produce a good sample but leaves the cause unresolved. Once a promising adjustment is found, repeat the trial and confirm that other quality requirements still pass. An improvement in appearance should not be purchased at the expense of dimensional fit or surface protection.
Validate quality after the box leaves the machine
Agree the conditioning and inspection interval with the material suppliers and the customer. A box that looks acceptable immediately after pressing may not be the final evidence required for shipment. Retain samples with their lids and inserts so that fit, opening and closing can be assessed together. Record stacking and transport conditions during the trial. Avoid attributing damage caused by an improvised storage arrangement to the wrapping operation without checking the handling history.
Test representative combinations, including the most demanding planned format. A small shallow box may not demonstrate the behavior of a larger or deeper construction. Likewise, changing the covering paper can change the practical setup even when external dimensions remain the same. Define the range covered by the accepted trial and list exclusions. That written boundary is more valuable than an unsupported statement that the machine has passed “all rigid boxes.”
Separate good-box output from nominal cycle speed
Count accepted boxes over a stated elapsed period. Record rejects, setup samples, interruptions and rework separately. If an operator removes a defect by hand, identify the labor and time rather than counting that box as effortless machine output. Ask whether the quoted output includes the upstream preparation required for the inner box. A forming machine’s cycle rate does not describe the productivity of the complete production route on its own.
For a simple comparison, divide accepted quantity by elapsed hours. If a trial delivers 720 accepted boxes over 90 minutes, the observed rate is 480 accepted boxes per hour. This is a calculation example, not a specification for the RSK-450X. Compare trials only when their time boundaries and inspection rules match. A short run with continuous manual support should not be compared directly with a longer run that includes routine replenishment and documented checks.
Review safe troubleshooting before production
Specify who may adjust recipes, who may change tooling and who may enter protected areas for maintenance. Store the current instruction set with the equipment and provide training for the actual configuration. Review adhesive handling information and the cleaning procedure with the relevant suppliers. In the United Kingdom, the HSE’s printing machinery guidance identifies setup and cleaning among the activities requiring risk control; other markets require their own applicable assessment.
For planning maintenance access, the HSE guidance on safe systems for cleaning printing presses illustrates why procedures depend on machine design and the task. Its press-specific examples are not rigid-box-machine instructions. The following WorkSafeBC training adds general hazardous-energy education for servicing; use the RSK-450X manual and your approved site procedure for the actual work.
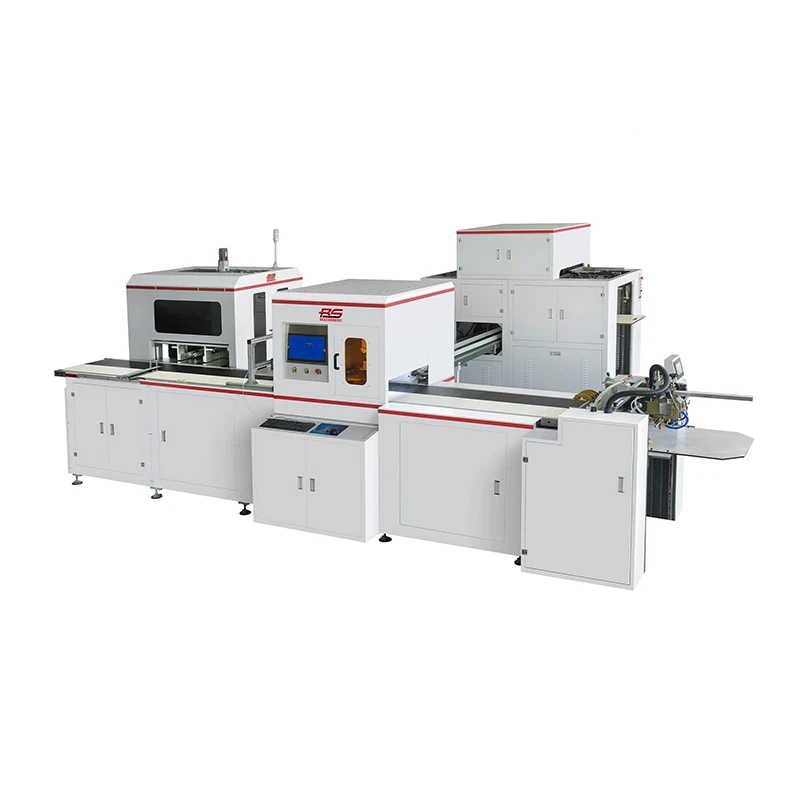
General manufacturing-safety training by WorkSafeBC. Watch on YouTube.
What to send when asking for technical help
Send the machine model and configuration, a short description of when the defect appears, labeled photographs, the drawing revision and material identification. Include the current approved recipe and the sequence of changes already attempted. A small set of well-labeled samples usually explains more than dozens of photographs without orientation or timing. Ask the supplier to identify the next safe observation and the person responsible for approving a process change.
Use the rigid box machinery range to identify whether the question concerns board preparation, assembly, gluing or wrapping. If the covering sheet is film laminated, review thermal lamination defects before blaming the final wrapping stage. For decorative foil problems on the same paper, use the separate hot foil stamping investigation. These upstream checks help keep one quality problem from being repeatedly passed to the next operation.
Frequently asked questions
Should pressure be increased whenever a bubble appears?
No. First determine where the defect develops and compare the material and application records. Any pressure adjustment must remain within the manufacturer’s procedure and be checked for other effects on the box.
Can a trial on one paper approve all covering papers?
No. Identify the material and construction covered by the trial. Different coatings, thicknesses, finishes or adhesive combinations need an appropriate review and, where necessary, another trial.
What makes a troubleshooting report useful?
A useful report connects the defect to a particular lot, drawing, setup, production stage and inspection time. Retained samples and a record of one change at a time make that connection much easier to investigate.